如何用云应用快速部署一个nodebb的开源论坛
秦睦迪,任职于腾讯医疗咨询与服务部,从事前端开发工程师一职,有丰富的前后端开发经验,云开发发烧友,一直在参与云开发 cloudbase freamwork 框架建设。
云应用是什么?
Serverless 云应用是云开发提供的一种无服务器容器托管平台,用户可面向代码/镜像等多种方式使用,无需维护复杂的容器环境,可专注于自身的业务,一键开通后即可享受能自动扩缩容的容器资源。具体可查看产品文档。
准备工作
clone 代码
首先我们先去 nodebb 的 github 找到对应的源代码下载到本地'
git clone https://github.com/NodeBB/NodeBB
然后我们来看一下 nodebb 的命令有哪些能力,这里仅把我们会用到的命令展示了出来
./nodebb --help

  Usage: ./nodebb [options] [command]

  Welcome to NodeBB

  Commands:

    start                           Start the NodeBB server
    stop                            Stop the NodeBB server
    setup [options] [config]        Run the NodeBB setup script, or setup with an initial config
    build [options] [targets...]    Compile static assets (JS, CSS, templates, languages, sounds)
mongodb
我们还要准备一个可以远程连接的 mongodb 的数据库
并在 admin 库中初始化一个管理员
db.createUser({
  user: "root",
  pwd: "******",
  roles: [
    {
      role: "userAdminAnyDatabase",
      db: "admin",
    },
  ],
})
初始化配置
我们先执行 setup 命令对项目的配置进行初始化,我们将事先准备好的数据库连接串填写导下面 mongo 的相关问题处
mongodb://root:******@xxx.xxxx.xxx.xx:27017/nodebb?authSource=admin
./nodebb setup

……此处省略无关日志


Please enter a NodeBB secret (6ddbb35e-b45f-47c3-894a-1c5c220a36ec)
Would you like to submit anonymous plugin usage to nbbpm? (yes)
Which database to use (mongo)
2020-07-05T06:30:38.832Z [52985] - info:
Now configuring mongo database:
MongoDB connection URI: (leave blank if you wish to specify host, port, username/password and database individually)
Format: mongodb://[username:password@]host1[:port1][,host2[:port2],...[,hostN[:portN]]][/[database][?options]] mongodb://root:******@xxx.xxxx.xxx.xx:27017/nodebb?authSource=admin

……此处省略无关日志

NodeBB Setup Completed. Run "./nodebb start" to manually start your NodeBB server.
执行完成后会在项目的根目录下产生一个 config.json 的文件,内容如下:
{
  "url": "http://localhost:4567",
  "secret": "6ddbb35e-b45f-47c3-894a-1c5c220a36ec",
  "database": "mongo",
  "mongo": {
    "host": "127.0.0.1",
    "port": 27017,
    "username": "",
    "password": "",
    "database": "nodebb",
    "uri": "mongodb://root:******@xxx.xxxx.xxx.xx:27017/nodebb?authSource=admin"
  },
  "port": "4567"
}
本地启动
安装完成以后,我们来本地启动一下是否安装成功,执行如下命令:
./nodebb start

Starting NodeBB
  "./nodebb stop" to stop the NodeBB server
  "./nodebb log" to view server output
  "./nodebb help" for more commands
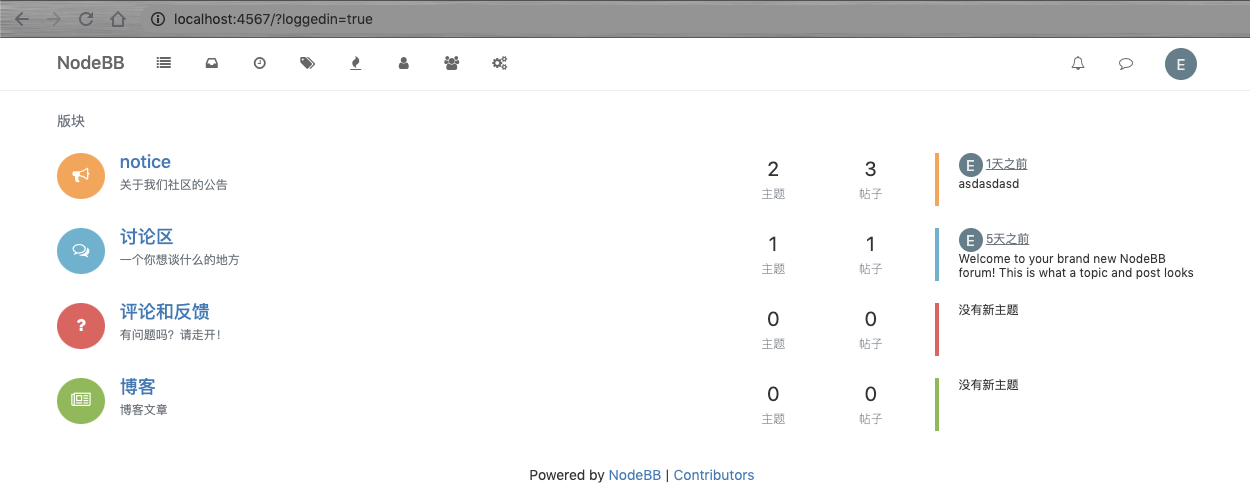
访问本地http://localhost:4567,这时我们可以看到论坛已经运行起来了
准备部署
nodebb 使用云应用部署特别的容易,因为项目本身已经帮我们把 dockerfile 编写好了,我们无需修改任何的配置,直接编译镜像即可,当然也可以借助各种 CI 平台,如果想使用 CI 方式的可以参考上一篇文章,这里使用本地打包的方式,执行命令如下:
docker build -t nodebb:v1.6 .
nodebb:v1.6 = 镜像名称:tag
执行 docker images 来看一下打包的镜像
REPOSITORY    TAG                 IMAGE ID            CREATED             SIZE
nodebb        v1.6                fa7e70e61829        2 days ago          1.63GB
如果想验证本地的镜像是否正确,可以在本地执行以下命令
docker run nodebb:v1.6
如果出现以下日志,打开本地http://localhost:4567查看能够使用全部的功能,证明镜像是正确的,可以推送云端仓库进行部署了
2020-07-05T07:05:43.025Z [4567/69] - info: Routes added
2020-07-05T07:05:43.044Z [4567/69] - info: NodeBB Ready
2020-07-05T07:05:43.050Z [4567/69] - info: Enabling 'trust proxy'
2020-07-05T07:05:43.053Z [4567/69] - info: NodeBB is now listening on: 0.0.0.0:4567
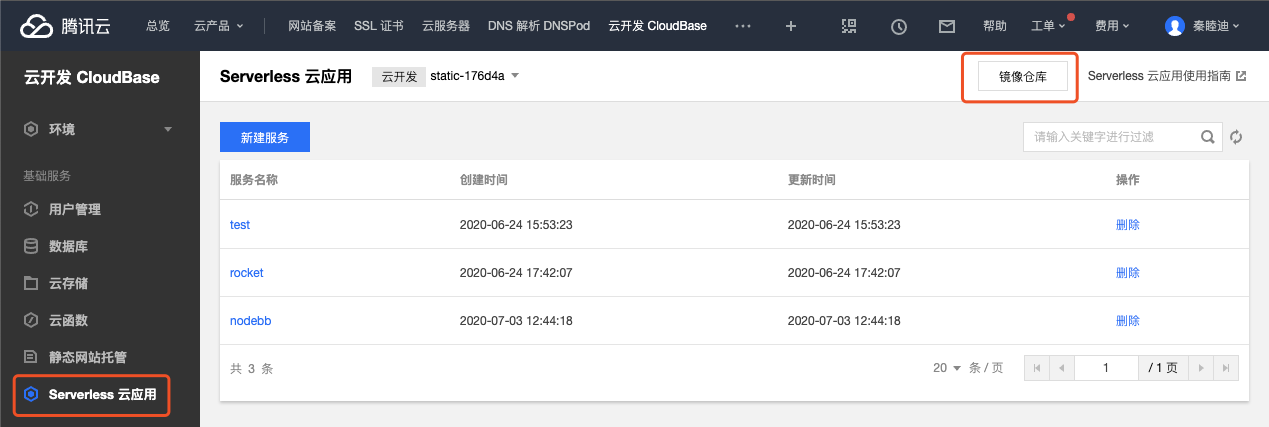
然后我们打开腾讯云来到云开发的界面,找到镜像仓库的位置
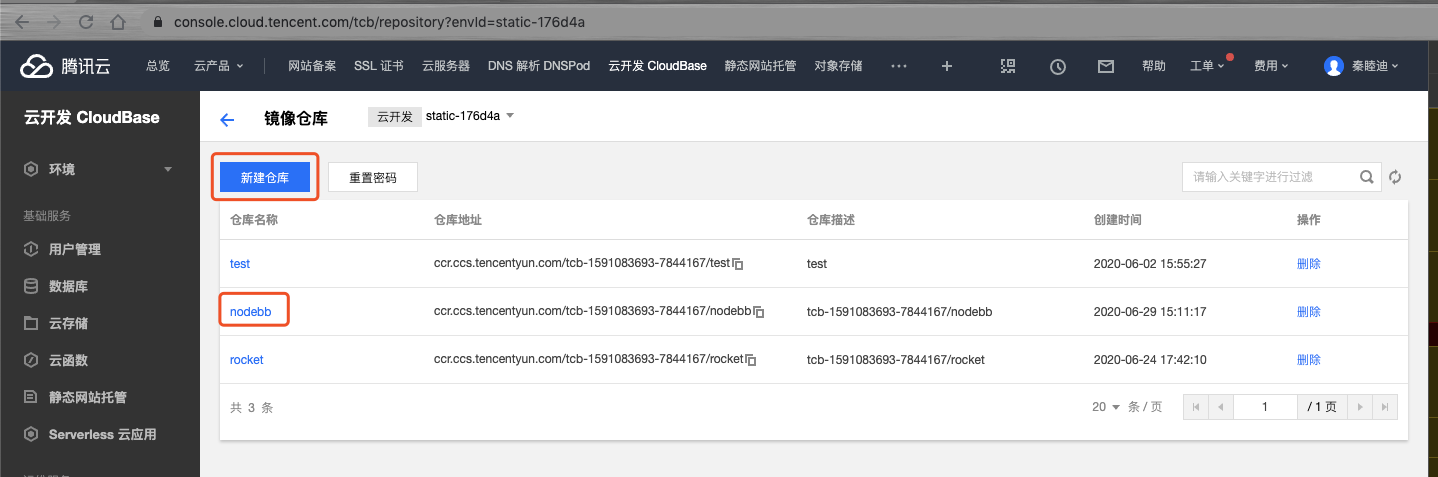
新建或者选择已有的镜像仓库
点击使用指引,用以下命令将我们本地的镜像推送到云端
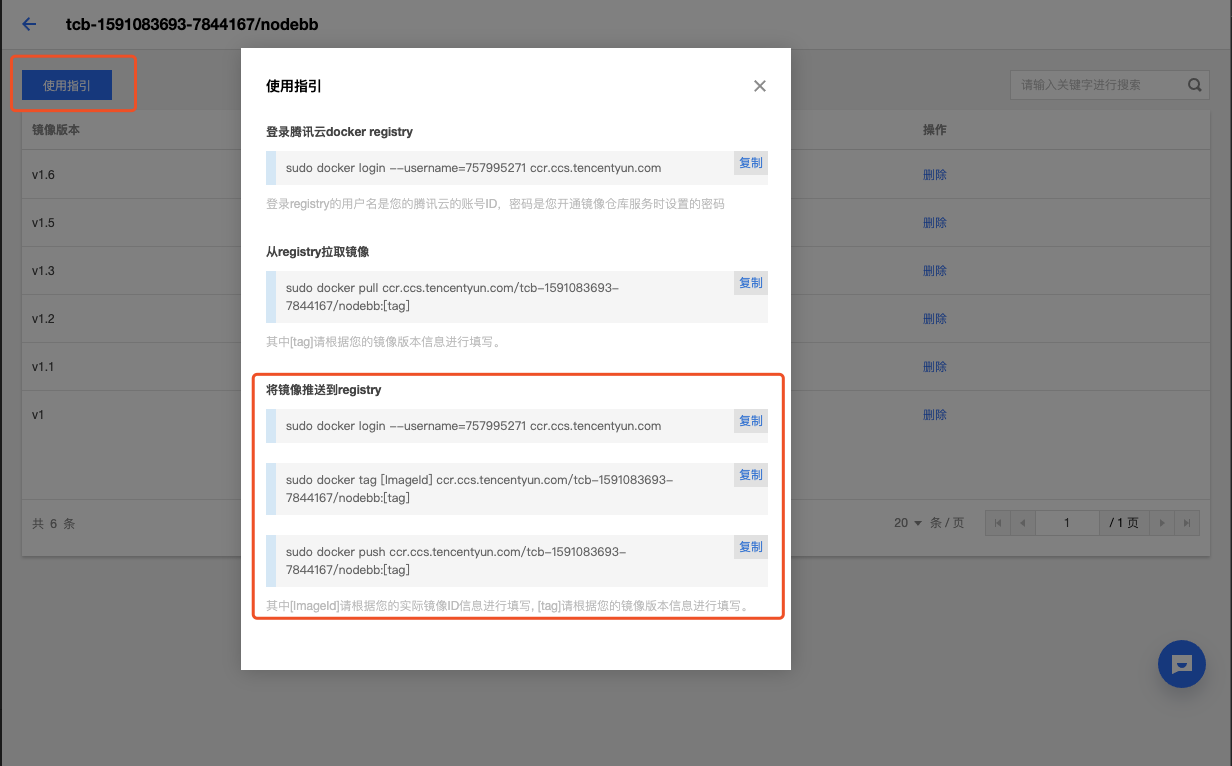
执行完红色区域的命令以后,执行 docker images,会发现多了一个远端的镜像地址
REPOSITORY                                             TAG                 IMAGE ID            CREATED             SIZE
nodebb                                                 v1.6                fa7e70e61829        2 days ago          1.63GB
ccr.ccs.tencentyun.com/tcb-1591083693-7844167/nodebb   v1.6                fa7e70e61829        2 days ago          1.63GB
云应用部署
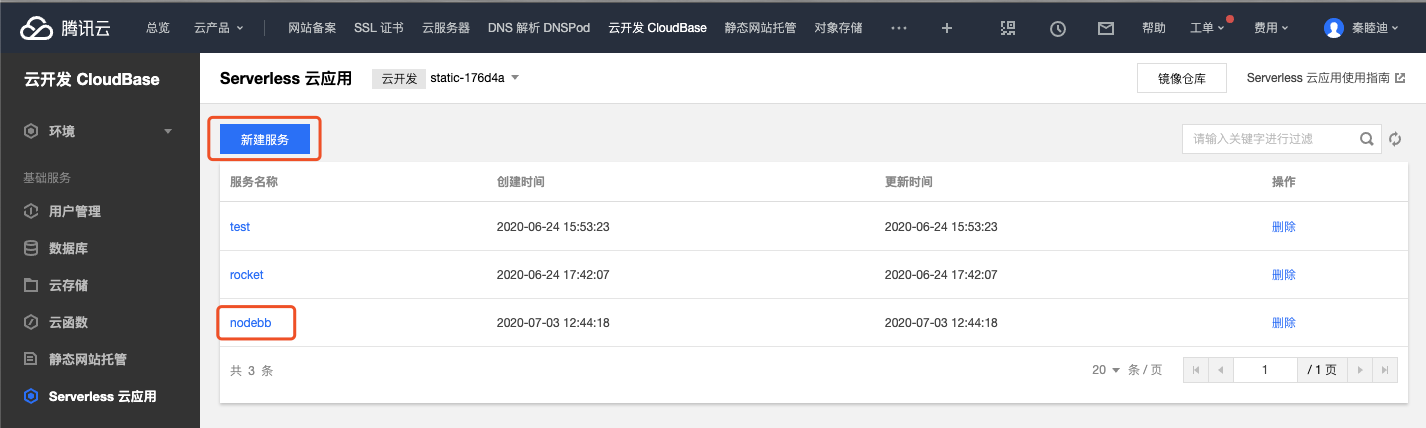
接下来我们回到云应用的界面
新建版本进行部署

这里需要注意的是服务端口一定要填写你服务启动的端口,这里不是对外访问的端口
开启 100%流量,访问的请求才会打到该对应的版本上
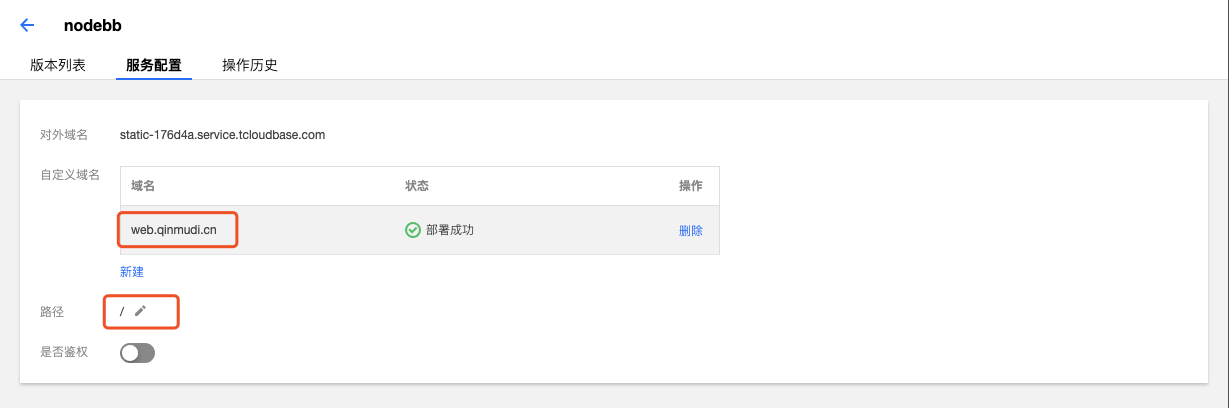
最后我们需要看一下服务配置,因为我没有该 nodebb 的路由配置,默认是根目录,所以我们调整一下服务配置
访问
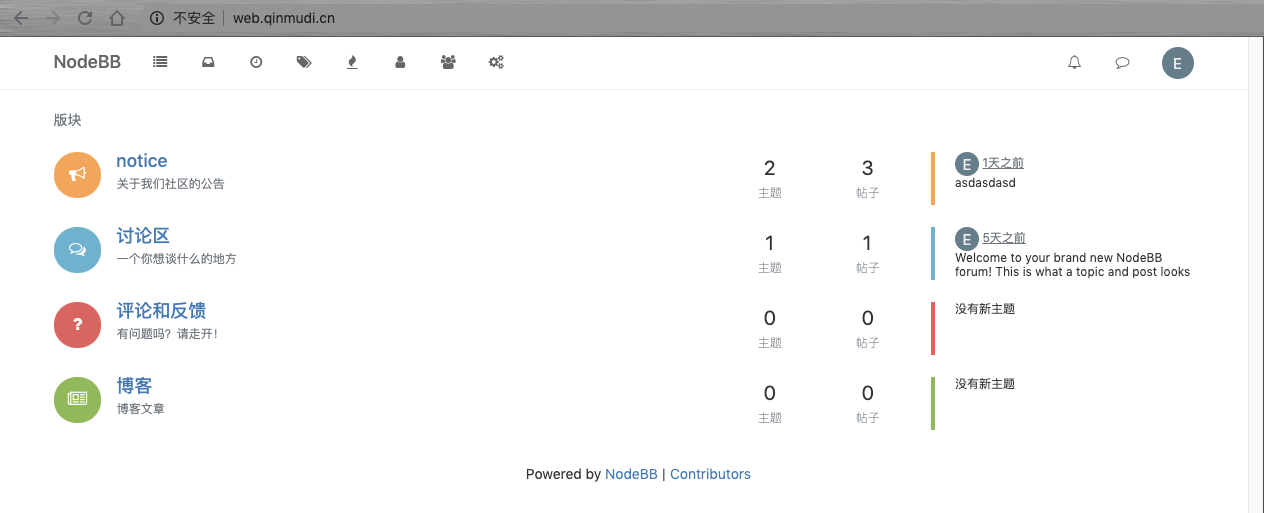
这时我们就可以对我们部署的应用进行访问了,访问域名http://web.qinmudi.cn/